lab00 : Setting up Notes Repos
| num | ready? | description | assigned MW lect | due MW lect | assigned TR lect | due TR lect |
|---|---|---|---|---|---|---|
| lab00 | true | Setting up Notes Repos | Mon 03/29 12:30PM | Fri 04/02 11:59PM |
One of the goals for this course is to forge a path for others to learn about Allolib.
We’d like to make it easier for new developers, composers and artists to get started with the tools for creating sound and visuals using Allolib.
So, as we make discoveries about things, we’d like to be able to share those with one another.
As a way of organizing this, in this assignment, you’ll each create a web page that is part of the website https://allolib-s22.github.io
I’ve created a repo for each of you with the naming convention: notes-GitHubId
Once you set up this repo per the instructions below, the content will be part of the public website where you can share information that you think would be generally useful for the class.
(If you would like to create content that is visible only to the other students in the class, there is a separate repo for that called
private-notes-GitHubId; these instructions will focus on the public facing notes pages for now.)
Step 1: Add an index.md to your repo.
First, locate your repo by logging into to GitHub, and visiting https://github.com/allolib-s22. You should
find a repo notes-GitHubId, where GitHubId is your GitHub id. (If you don’t, ask for help on the course slack, https://allolib-s22.slack.com.)
When you start, this will be an empty repo, and so the page may look like this:

To get started, click where it says: creating a new file
- It’s the little blue text under Quick setup — if you’ve done this kind of thing before
That should take you to a screen that looks like this:

In the blank for new file name, enter index.md, and then enter the content shown in the window below:

For #Notes from Chris G., substitute your own name (or if you prefer to remain anonymous, your GitHub Id).
The # makes a top level heading (an <h1> element in HTML terms).
To save the file, scroll down and click the green Commit New File button (it looks like this:)

Step 2: Turn on GitHub Pages
Next, go to the settings tab on your repo. Settings is all the way at the right edge, on the top row menu.

Once you are there, the left nav looks like this. You are looking for the Pages link, almost at the bottom:

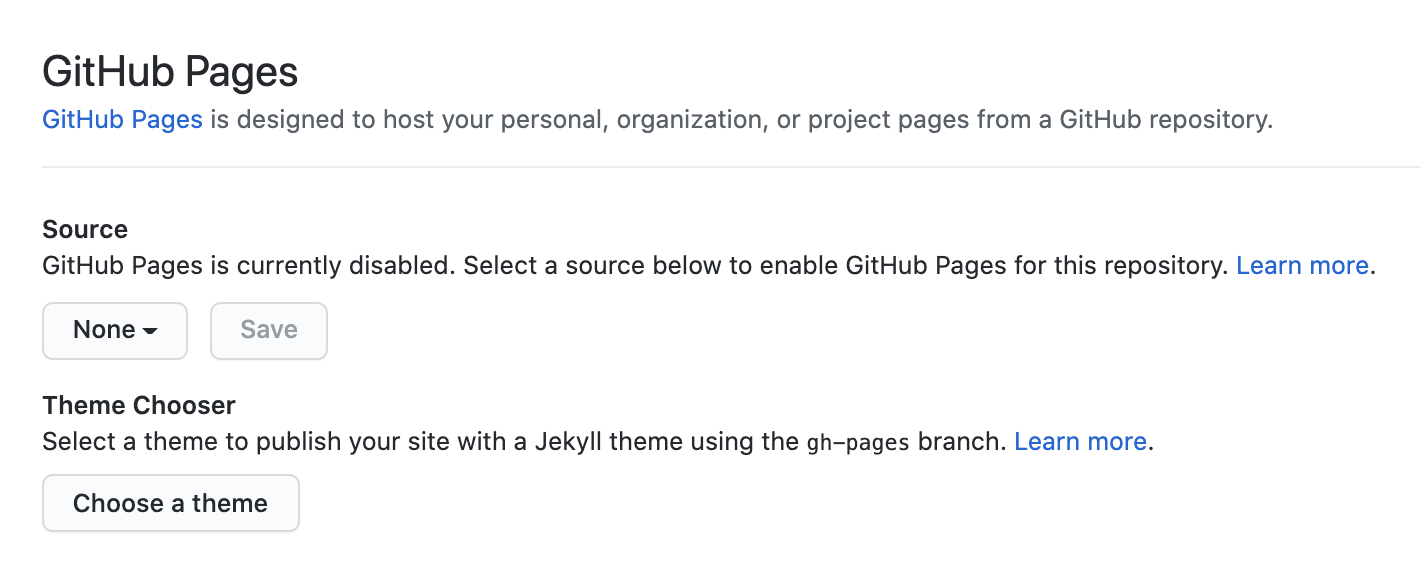
Click Pages, and you should land on a page like this one:

Click the Source drop down; this should give you the option to select main.

Once you do, you should see this:

Then click Save. That should change the screen to look like this:

At that point, the link shown (in this case, https://allolib-s22.github.io/notes-cgaucho/, should take you to your published web page.
Note that it sometimes takes between 60 seconds or as long as up to 5 minutes before the page appears (depending on server load), so you might have to refresh a few times before it shows up.
You should eventually see a page that looks like this one at your link:

Step 3: Submit a link to your repo and page on Gauchospace
To signal that you are finished with this step, please submit on Gauchospace here: